|
Getting your Trinity Audio player ready...
|
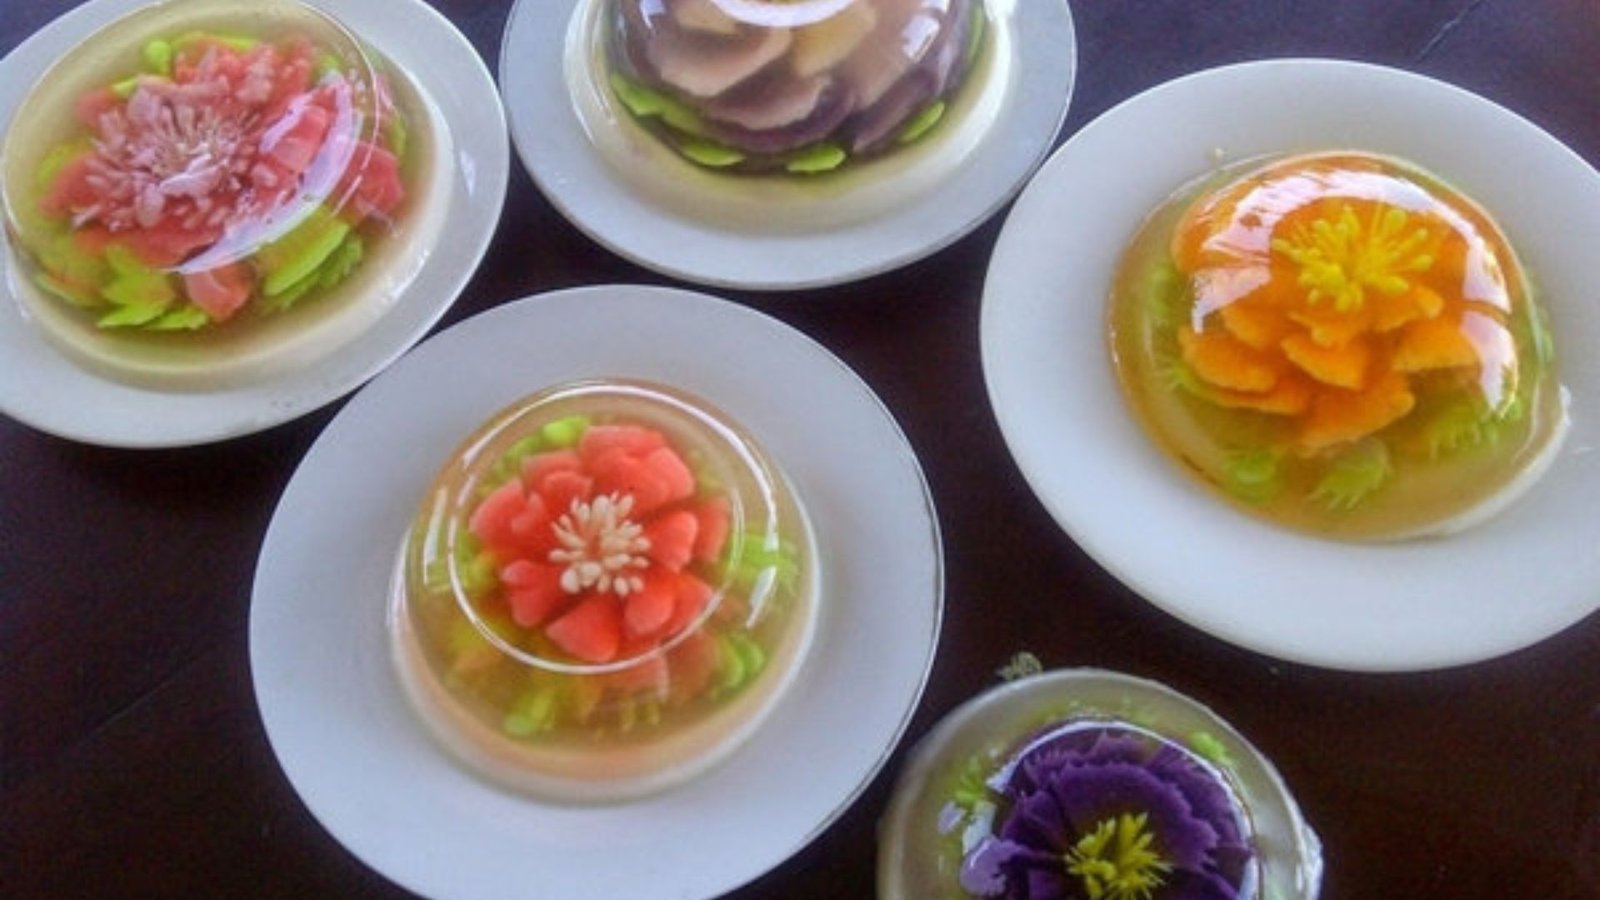
Jelly art is not just a treat for the taste buds but also a feast for the eyes. With vibrant colors and intricate designs, jelly art has become a popular culinary trend. Whether you’re a beginner or an aspiring jelly artist, these tips will help you embark on your art journey with confidence.

Select High-Quality Ingredients
The foundation of a perfect jelly art creation begins with quality ingredients. Choose a high-quality gelatin that sets well and provides a smooth texture. Opt for fresh fruits and clear juices to enhance the visual appeal of your jelly.
Master the Basics of Gelatin
Understanding the properties of gelatin is crucial for successful art. Follow the recommended gelatin-to-liquid ratio to achieve the right consistency. Experiment with different types of gelatin to find the one that suits your preferences.
Invest in Quality Molds
Investing in good-quality molds is essential for creating intricate and well-defined designs. Silicone molds are popular for jelly art due to their flexibility, making it easy to release the jelly without damaging the shape.
Layering Techniques
Achieve depth and complexity in your art by mastering layering techniques. Allow each layer to set before adding the next, creating a visually appealing and multi-dimensional effect. Experiment with contrasting colors for a striking result.
Use Food Coloring Wisely
Food coloring adds the vibrant hues that make jelly art visually stunning. Use gel-based food coloring for a more intense and concentrated color.
Create Jelly Artistic Designs
Let your creativity flow by experimenting with different designs. Use small tools like toothpicks or skewers to create intricate details and fine lines in your art.
Temperature Matters in Jelly Art Making
Pay attention to the temperature when preparing and setting the jelly. Too high a temperature can cause the colors to bleed, while too low a temperature may result in uneven setting. Follow the recommended temperature guidelines for optimal results.
Patience is Key
Jelly art requires patience, especially when waiting for each layer to set. Rushing the process may lead to blurred designs or uneven textures. Allow ample time for each layer to firm up before moving on to the next.
Experiment with Flavors
Don’t limit yourself to one flavor. Experiment with various fruit juices, extracts, or even herbal infusions to add depth and complexity to your jelly art. Consider the flavor profile of each layer to create a harmonious taste experience.
Practice, Practice, Practice
Like any form of art, mastering jelly art takes practice. Don’t be discouraged by initial attempts; instead, use them as learning experiences.
Use Clear Containers
When creating layered jelly art, consider using clear containers to showcase the beautiful layers. This allows your intricate designs to be visible from all angles, adding to the overall visual appeal.
Create Gradient Effects
Experiment with creating gradient effects by adjusting the concentration of food coloring in different parts of your jelly mixture. This can add a stunning visual dimension to your creations.
Incorporate Edible Flowers
Elevate the aesthetic of your jelly art by incorporating edible flowers. Choose flowers that are safe for consumption, such as pansies or violets, to add a touch of elegance and a burst of natural color.
Utilize Fruit Purees
Instead of relying solely on clear juices, consider using fruit purees to infuse additional flavor and texture into your jelly layers. Purees can also contribute to a more vibrant and natural color palette.
Play with Textures
Add a playful element to your art by experimenting with different textures. You can introduce a contrasting layer with a slightly firmer texture or incorporate small fruit pieces for a delightful surprise.
Customize Shapes with Cookie Cutters
For more defined shapes, use cookie cutters as molds. Pour your jelly mixture into the cookie cutter placed on a flat surface, and let it set. Once it’s firm, carefully remove the cookie cutter to reveal a well-defined shape.
Create Marbling Effects
Achieve mesmerizing marbling effects by gently swirling different-colored layers together before they set. This technique adds an artistic and dynamic touch to your jelly art.
Conclusion
In conclusion, jelly art is a delightful combination of creativity and culinary skill. By following these tips, you can elevate your art creations from simple desserts to edible masterpieces. Enjoy the process, embrace experimentation, and let your imagination run wild as you dive into the sweet and colorful world of the art. Whether you’re creating the art for personal enjoyment or wowing guests on a special occasion, these tips will set you on the path to becoming a jelly art maestro.